How to Import Users in User Management
To streamline user management, you can easily import users in your myArrow account settings. You can utilise a standardised file format like .csv to organise and input user information. This tutorial will teach you how to import users to your myArrow account.
Navigating to User Management
To start, navigate to the myArrow website at www.myarrow.nz, and log in to your myArrow account using your email address or Unique User ID.

On your dashboard, move your cursor to the upper right portion of the screen and click Settings.
You will redirect to the Account Settings page, with sections on the sidebar. This includes General Settings, Wardrobe Management, Account Address Book, User Management, User Groups and Recycled Garments.
Click on the User Management Tab to redirect to the User Management page.
Importing Users
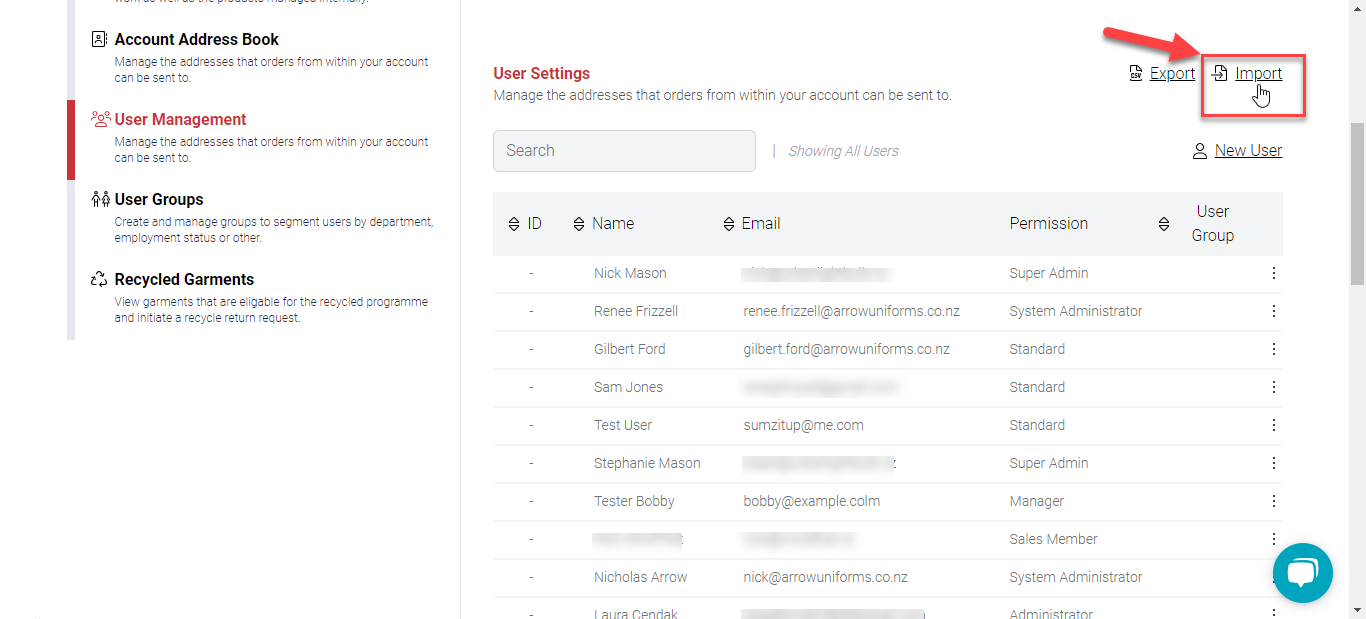
Click the “Import” button beside the “Export” button on the User Management Page.
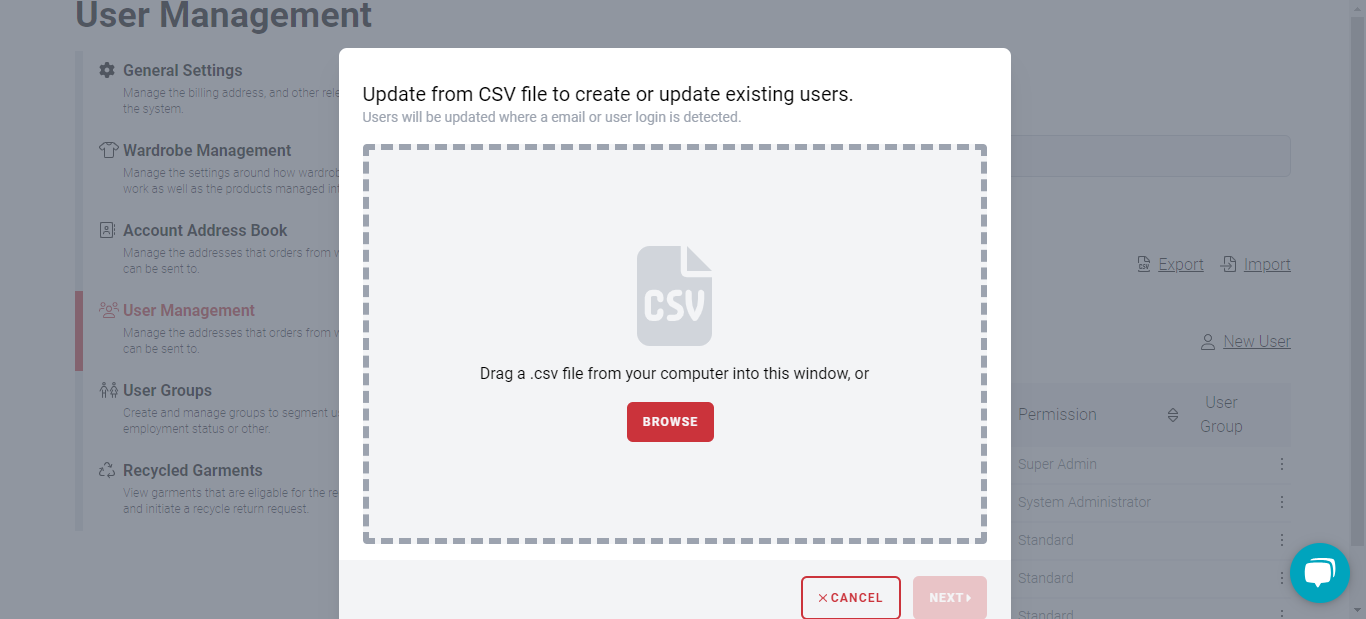 A file box will allow you to drag and drop any .csv file. Alternatively, you can click the “Browse” button to look for the file on your Desktop. Once the file is loaded, click "Next."
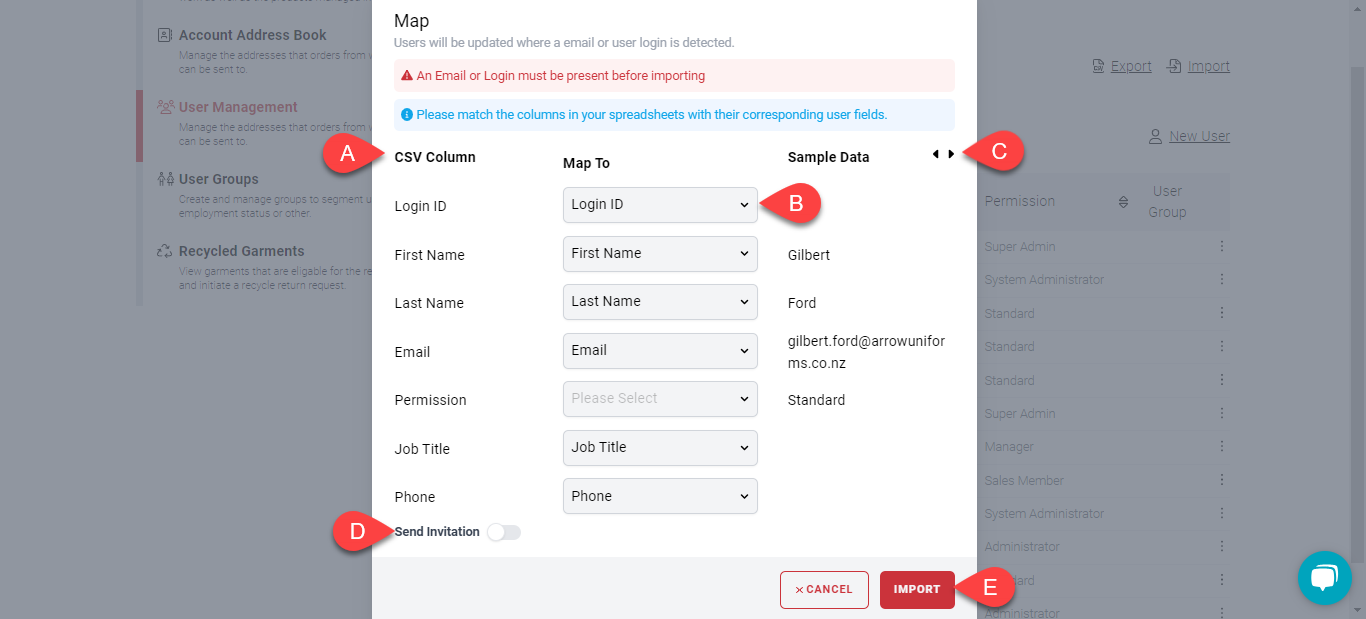
Notice that the (a) columns are automatically matched to fields. You can (b) click the dropdown button to map it to the correct field. The options include Login ID, First and Last Names, Email, Role, Job Title and Phone.
On the rightmost side (c) are the sample data to serve as a reference for mapping your data to the correct field.
You can (d) toggle on the “Send Invitation” button to automatically send email invitations once the users are imported.
When finished, (e) click the “Import” button.
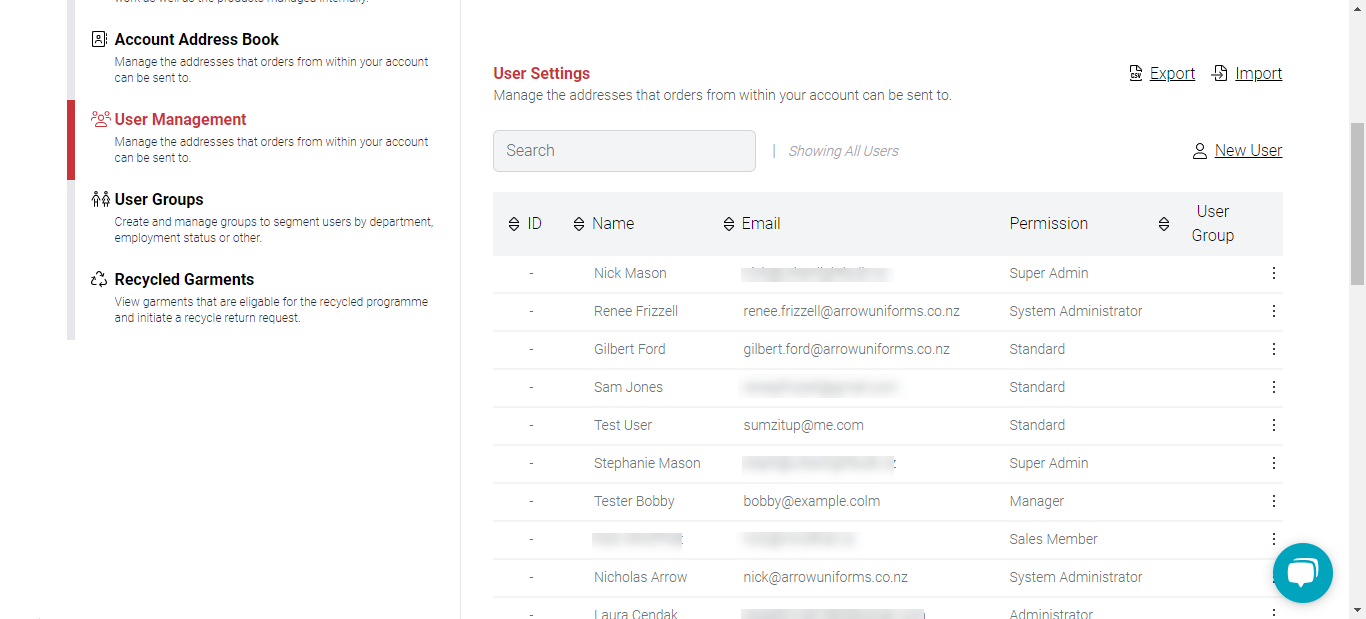
Here is a sample list of imported users.
Manually Adding New Users

You can also manually add new users to the list. Click the “New User” button parallel to the Search Bar. A new box will appear with text fields where you can type information. When done, click the Save button. The new user should appear on the user list.