Uniform Closet
How to Use Wardrobe Manager in Your myArrow Account
The Uniform Closet feature allows uniform managers to add and store garments allowing for easy adjustments in quantities and disposal of unused items.
This guide will teach you how to use and navigate the Uniform Closet for easier management of staff uniforms.
Important Note: Please note that the Uniform Closet features may not be accessible on your myArrow sites. For further details, please reach out to your sales manager.
Adding Garments to Uniform Closet
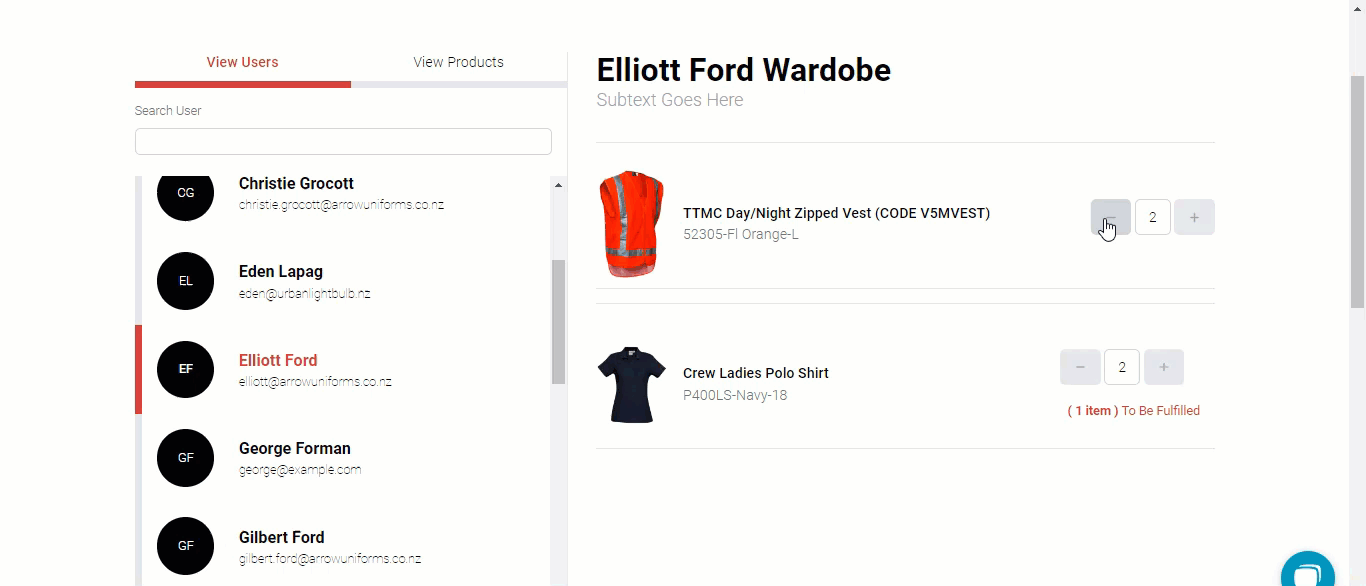
One way to add garments to the Uniform Closet is by going to a user’s wardrobe and clicking the “-” button. A new dialogue box will appear, prompting the user to either move the garment to the Uniform Closet or move it to disposal.
Once you choose “Return to Uniform Closet”, click the Save button. You should see the garment when you go to Settings and click the Wardrobe Management Tab.
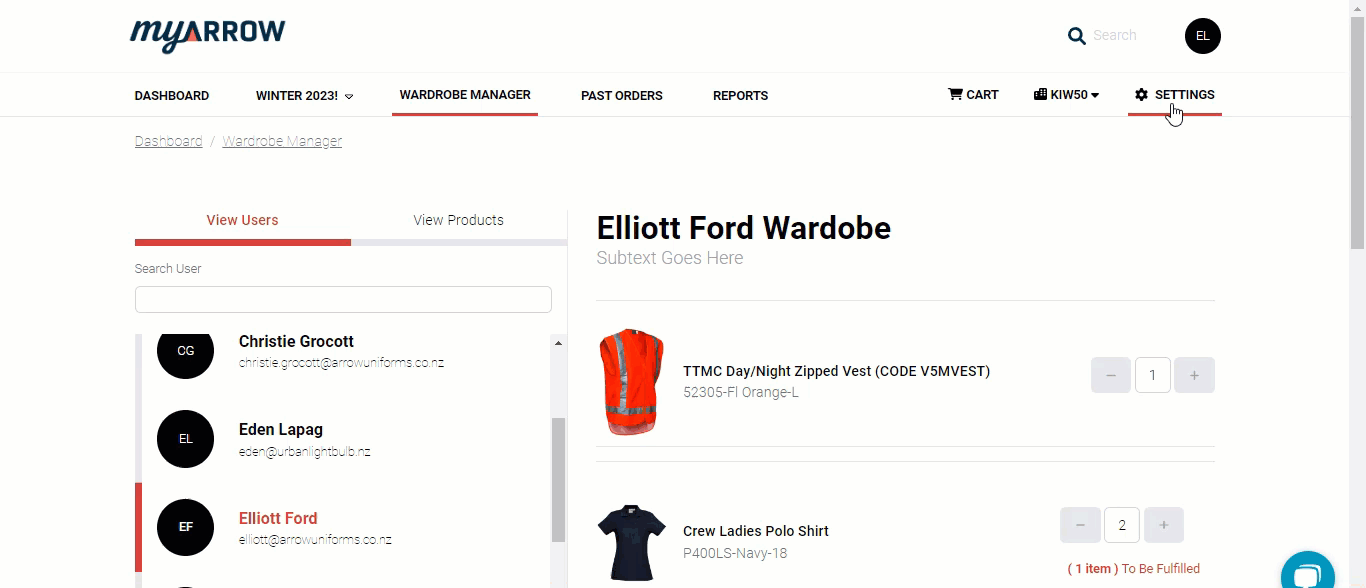
Another way to add a garment is by going to the Account Settings page. To do this, click the Settings button, and you will redirect to the Add Settings page. Click the Wardrobe Management Tab and look for the “Add Garment” button in the Products Section.
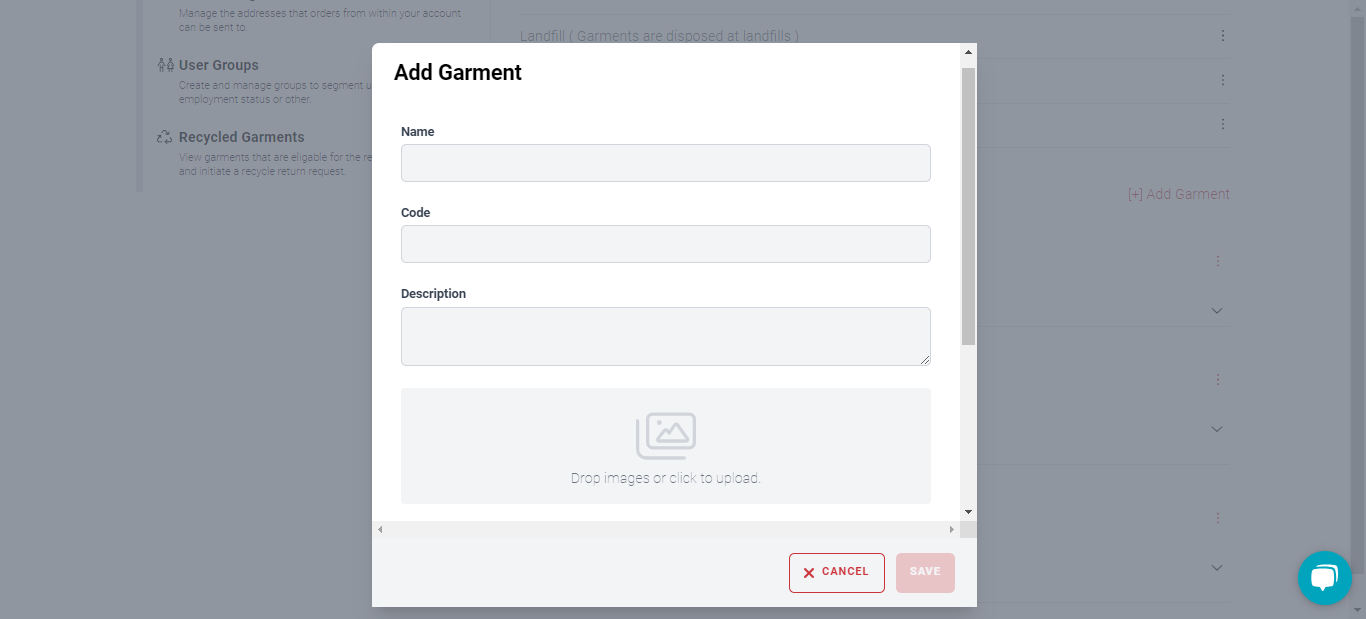
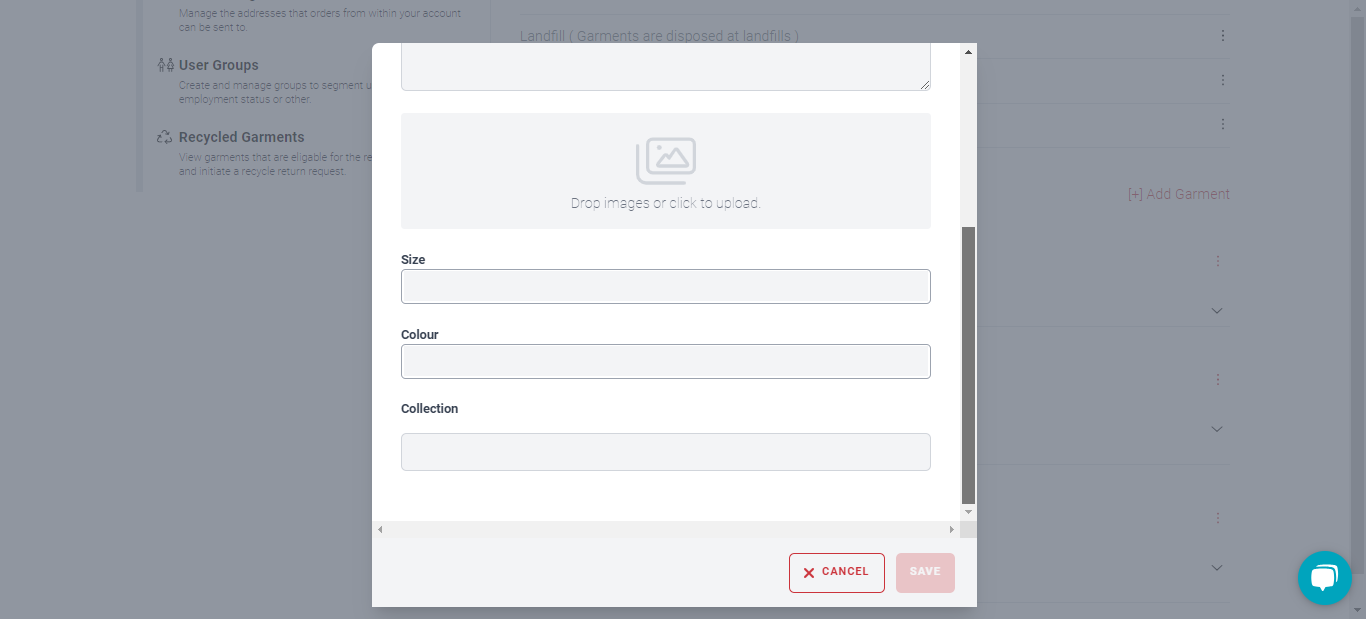
A new dialogue box with text and image fields will appear. You can add the name, code, description, size, colour and collection of the new garment. It is important to note that you can add garments not originally part of your myArrow collection to the Uniform Closet.
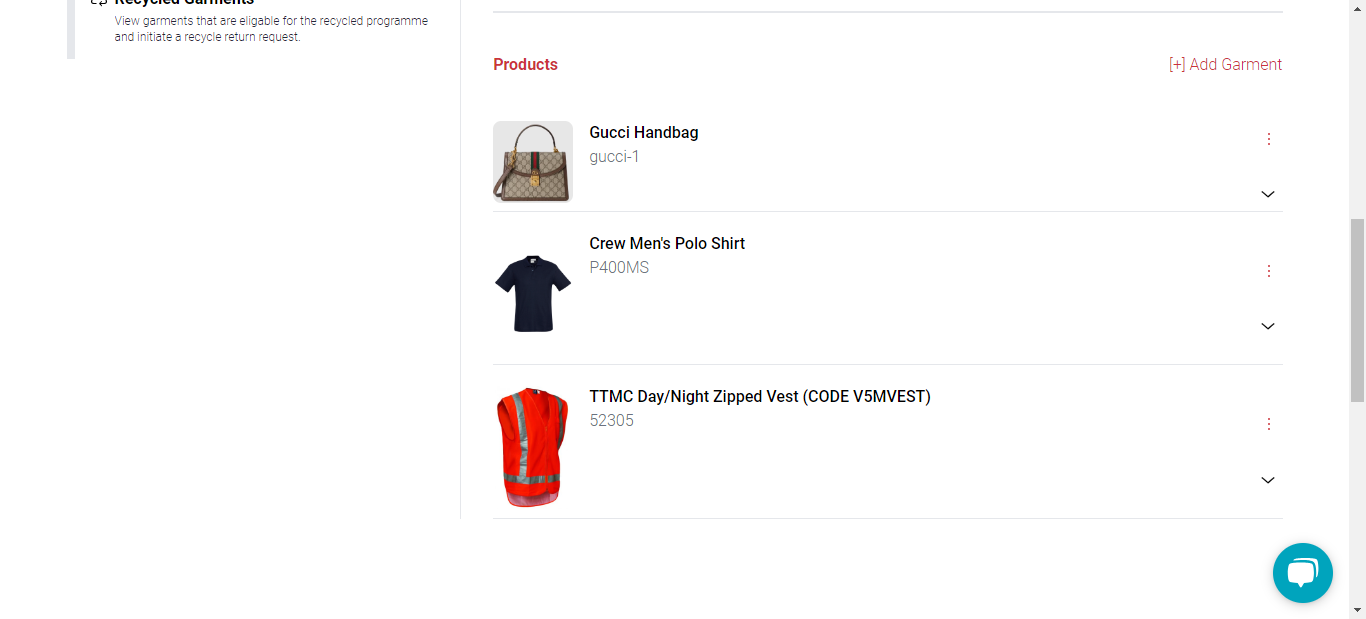
When done, you should see a list of the products on the Wardrobe Management Tab.
On the Wardrobe Manager page, you can see the inventory list of your Uniform Closet when you click the View Products Tab and click “Show items with closet inventory.” For detailed instructions, see the Wardrobe Manager Tutorial.